Showing posts with label Children's Cakes. Show all posts

Thursday, April 18, 2013

Snow White Princess Cake

I know, I know, I'm sorry.  Worst blogger ever.  Honestly though, I have been pretty busy with other things lately, and even considered giving up the blog altogether.

Instead, I have decided I am going to try very hard to post something more often - even if it's just a picture of the latest thing I've been baking (or sewing!).  If less wordy = less time consuming, then that's the way those posts will be.  At the end of the day, you'd probably rather just see pictures of cake than listen to me ramble anyway, right?  :o)

So anyway, this is a cake I made for a little girl's 6th birthday recently(ish).  She wanted a Dolly Varden style Snow White cake.  I've never done a Dolly Varden cake before, so it was quite interesting and fun for me to try it out.  Here's what I ended up with:


Snow is wearing her classic outfit, all made from sugarpaste (ie rolled fondant icing), including the bodice and sleeves, which I stuck directly onto the doll.  The only things that aren't edible are the doll itself, her hair, and her crown (this is a plastic one that came with the doll, so I figured why make work for myself when the plastic one is just as cute anyway - plus the birthday girl can keep it for her other dolls afterward).  You can't really see it very well in the photo, but the little apple next to Snow was completely covered in red cake decorating glitter - it was super sparkly and looked pretty cool, if I do say so myself!  :o)


The cake underneath the skirt was chocolate Madeira cake, and I baked it in two sections - one in a pudding basin (for the shape), and the other in a regular round eight-inch cake tin.  I then stacked the pudding basin one on top of the round one and trimmed them to become one cohesive skirt shape.  This gave the cake a good amount of height.  If I had just used the pudding basin alone, she would have been a very short and stumpy princess!  There is of course such a thing as a proper Dolly Varden cake tin, but I don't have one, and I've also heard that they're quite difficult to work with.  Anyway, I found this method worked just fine.

Not sure if the method I chose for covering the skirt was the best one, as it was a lot harder than I had expected.  But I think the end result was pretty good for my first try - and the birthday girl and her mum were Thrilled, which is the important thing!

Wednesday, February 20, 2013

Rainbow Magic Fairy Cake!

Phew, it's been busy around here!  Life is settling back to normal now though, with The Muffin back at school (she has just started Grade One - goodness my baby is growing up!)

The Muffin's latest obsession has, for a while now, been the Rainbow Magic fairy books, by Daisy Meadows.  For her birthday, she obviously wanted a Rainbow Magic fairy party.  I had plans to make a plain round cake and decorate it, but The Muffin had other ideas.  "Mummy can I have a Pot At The End Of The Rainbow?  With the fairies all in it?"  I warned her there would be a fair bit of black involved, which she was (somewhat surprisingly) fine with, and then we compromised on her four favourite fairies, rather than all seven.  In the long run, this was her cake:

I made a collage so you don't have to scroll through so many photos!  You're welcome.  :o)

The cake itself was white chocolate Madeira cake layered with raspberry Swiss Meringue Buttercream (The Muffin's choice).  All the decorations were made from sugarpaste with a bit of CMC mixed in.  The fairies were made naked, and then their clothing and hair was painted on with royal icing.

Amber would have looked better suspended on white florists' wire rather than green, I think, but I didn't have any strong enough.  It was less noticeable at the party, as it wasn't against the white background!

I was very pleased with my Bertram The Frog:


But in the end, I actually think this was my favourite bit of the whole cake:


 I had racked my brains trying to think how I was going to do the inside of the Pot At The End Of The Rainbow.  Obviously it couldn't be hollow (with furniture in it), because then there would be no cake in it.  But I didn't want to just do it black, either.  This was quite a black cake for a six year old anyway, I thought!  And then suddenly I had a great idea:  what would you see if you looked into a pot full of Rainbow Fairies?  Why, rainbow colours of course!  And lots and lots of sparkles, obviously (which once again Do Not show up in photographs).  I thought it was quite effective, The Muffin was thrilled - and it was Super Easy.  Win-win!

We also had cookies - I'll show you those tomorrow!

Monday, October 15, 2012

2012 Royal Show Entries

Once again, The Muffin and I both entered some of our baking efforts into The Perth Royal Show this year.  Here's what we entered...

Cinderella Cupcakes:  I entered these into the "Decorated Patty Cakes"  (ie cupcakes) section - and I won! 


The cupcakes themselves were my usual vanilla recipe (ie Billy Reece's Vanilla Vanilla recipe), frosted with my own vanilla buttercream.  The decorations are almost all sugarpaste (with a little CMC added).  There's a little royal icing to stick everything on, and also a tiny bit of piping on the "glass slipper" - oh, and the wheels of the carriage were lovely piped swirls of royal icing, painted with silver lustre.  But I took these photos after the Royal Show, and sadly the wheels were smashed to tiny pieces by the time I got them home!  So you'll just have to imagine them.


I was quite pleased with my little pumpkin - and it was very easy to do, too - I think with a different colour icing for the base, it would make a lovely Hallowe'en cupcake, too!


And here's a closeup of Cinders herself - she was the most time-consuming to make (unsurprisingly perhaps, although honestly I was expecting to have a lot more grief than I did with the glass slipper, having never made an icing shoe before.  It was easier than I thought it would be).  Cinderella's head and torso (with arms attached) were skewered with a piece of uncooked linguine (I thought spaghetti would not be strong enough to hold this, as it was quite a heavy decoration for a cupcake.  The linguine was a bit thicker and stronger), and left to dry overnight.  Then when it came time to decorate the cupcake, I simply draped a biggish circle of blue sugarpaste over the cupcake for the skirt, added the poofy bits of the skirt on in a slightly lighter blue (please feel free to admire my superior knowledge of dressmaking terms), and added Cinders to the top, pushing the linguine down into the cupcake to support her.

It was a bit of a rush job getting these cupcakes done this year - I just couldn't get inspired, so I ended up leaving it until the day before the delivery day to start making the decorations!  Luckily everything dried sufficiently, and I was happy with them in the end.

Bring on the cookies!  My cookies I was very happy with - no dramas here, I had a clear vision of how I wanted them to turn out, and they did...


Some of you may recognise the Dragon Claw Cookie (top right), and you'd be right - I originally made this cookie design to enter LilaLoa's Creative Cookie Competition way back in March.  It didn't win then, but guess what?  My cookies DID win at the Show!  Woo hoo!

I also got Second Prize in the "Cake Using Honey" class, but I didn't take a photo of that, because it was pretty boring looking (no icing allowed, etc).  It's a really yummy cake though, and it was based on my Sunny Honey Cupcakes recipe.  If you haven't tried lavender and honey cupcakes yet, then you should totally go and make these immediately - they are really yummy!

As pleased as I am about my Show wins, funnily enough the prizes I was most excited about were two little "Highly Commended" certificates - and they weren't even mine.  Because The Muffin entered two classes this year, and she got Highly Commended for both!  Happy Mummy Dance!  I was SO happy she got this bit of recognition, because she works so hard on her Show cookies, and she's always been so good about saying "I don't mind if I don't win, Mummy - it's fun just entering".  But you know that deep down in her little five-year-old heart, she'd love to win something.

Here are her Decorated Cookies:


I didn't help her at all with these, she did the lot herself, including making the little sugarpaste heart and flower (I did help bake the cookies obviously, but the kids' cookies are not judged on taste, only on appearance - they are even allowed to use store-bought cookies - so the baking part doesn't count in this class).

2012 is Year Of The Farmer, so there were special "Scarecrow" classes this year in every category.  I didn't enter any of these, but The Muffin did enter the kids' special class, which was "Scarecrow Biscuit".  What they had to do was use commercial cookies and lollies to make a picture of a scarecrow, glued down with icing onto a paper plate.  Here is The Muffin's entry:


Congratulations, Muffin!  Your Daddy and I are both so proud of you!

Saturday, February 11, 2012

Once Upon A Time...

...there was a beautiful, clever, funny little princess. Her mummy called her The Muffin, even though that wasn't really her name ('cause that would be weird).

And this year, she turned five.

For her first ever "friends" (or kids') party, she wanted a Princess Party. She chose this theme approximately 50 weeks ago, after having spotted the photo on the box of my Wilton's Romantic Castle Kit. Yes folks, she tailored her entire party theme around her choice of cake, and has been planning it all year. This Is So My Child.

In fairness, she is also a big Cinderella fan, so I'm sure that helped her decision somewhat.

We decided on purple, pink, white and silver as the colour palette (unoriginal, but Oh So Princessy)...


There were savoury foods, obviously, but really who knows (or cares) what they were? Let's be honest: it's all about the sugar.

I was pleased with how the cookies turned out, even though I didn't notice until JUST NOW that I failed to add the white outline to one of my shield/coat-of-arms cookies! But as far as I'm aware, neither did anyone else, so I am choosing to believe that.

There were also cupcakes, simply frosted with raspberry buttercream, and each topped with either a silvery-purple sugarpaste crown, three sugarpaste blossoms, or a Wilton's princess cakepop pick (they work well on cupcakes!).

I almost always make fruit skewers for parties, as they provide a healthy option whilst generally still being hugely popular. This time I wanted them to be a little prettier than usual, and I must thank my mother for stepping in and cutting all the little flowers and things out (even though the whole time she was saying "This is taking For Ever", and "I still don't really get what these are supposed to be"). In the end I think they looked great! (Thanks Mum!)

We had really pretty Paper Eskimo "Princess Girl" balloons, (but not the spotty ones, because I used those for the Spotty Party last year) and I even went all Martha Stewart and made these big tissue paper pompom thingies:


And can I just say: So Much Easier than I thought they were going to be! Instructions at yes, you guessed it, Martha Stewart. I see a lot more tissue paper pompom thingies in my future...

And oh yeah, here is the cake:

This was made with the Wilton Romantic Castle Kit, so there is significant plastic. Also as you can see, the design is fairly simple. I had originally planned to pipe little green leaves around the flowers, and a leafy border around the bottom of the whole castle, but I just ran out of time. Funnily enough though, in some ways I think I'm quite happy I didn't add anything else - I think it has a kind of pale purity that might have been lost by the addition of another colour. (Yes, that is my story and I am sticking to it). Plus my little princess and her friends all LOVED it.

The little flowers were cut from sugarpaste with a blossom cutter, each with a tiny silver cachou in the centre. The little crown over the doorway is a candle. All the other pink and purple bits are royal icing sprinkled with sanding sugar.

On arrival, the kids all decorated their own crowns (the templates for which I found here).

This is The Muffin's finished result:

The little princesses (and one very handsome prince!) played musical cushions, pass-the-parcel, and Find Cinderella's Lost Slipper. When the time came to leave, they all took home a loot bag filled with lollies, Disney Princess lip gloss, a castle hair clip, princess stickers, and a pretty eraser (and no, I didn't give the boy lip gloss! He got a toy horse, eraser, and knight-and-dragon stickers instead).

My little Muffin had the best time! I'm sure that in years to come, she'll be wanting parties at the newest coolest party place, or wanting to hire hundreds of dollars worth of party entertainer, but I love that for now she is just so happy to eat pretty cookies with her friends. Happy Birthday, sweetheart!

Monday, February 6, 2012

Over the Rainbows

Finally as promised, here are the photos of my beloved Muffin's fifth birthday party - the first one, that is!

(nb: Cake pop idea from Bubble & Sweet)

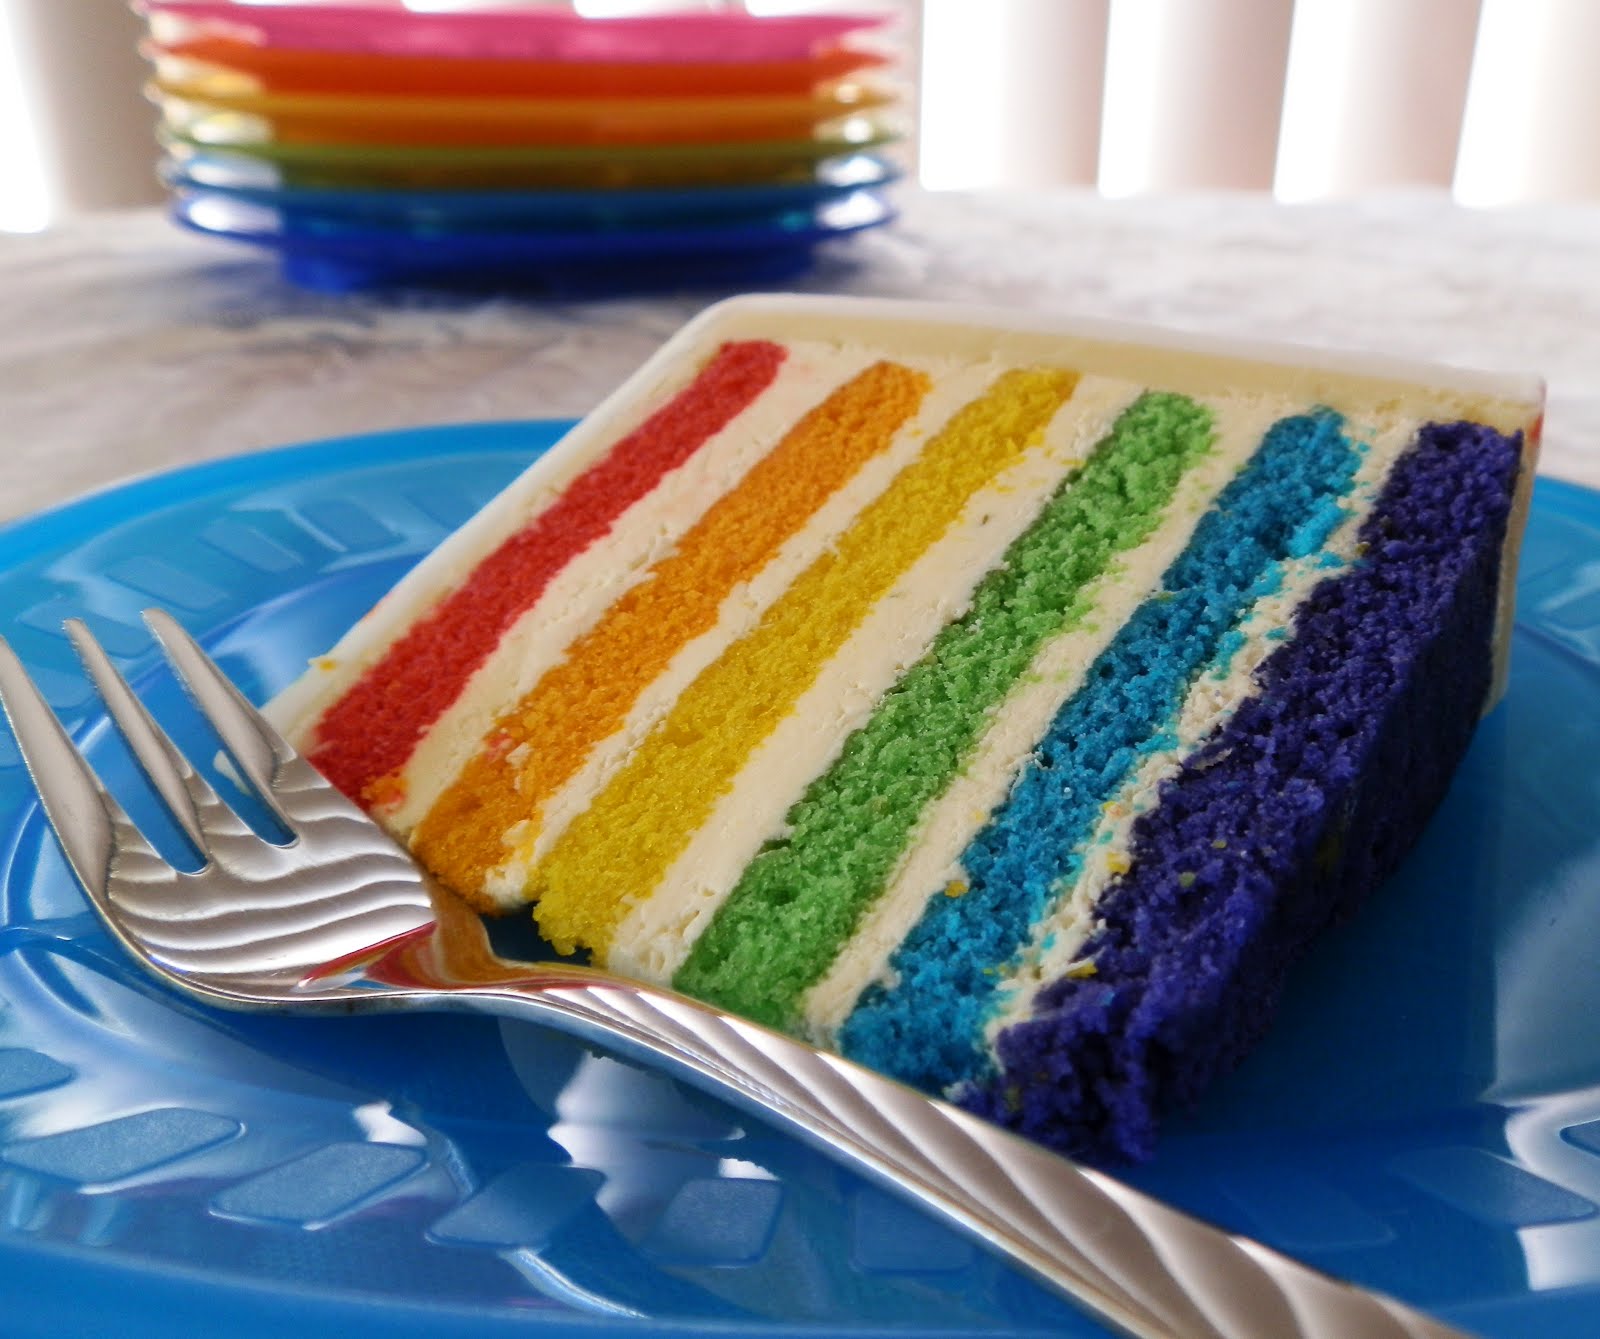
The Muffin had decided that she would like "a night party" with the family, just like the big girls (her older cousins) have. This is generally a simple get-together, where everyone brings some sort of finger food along to share for dinner. We decided on a Rainbow theme for this party, partly because it's a bright, happy and Super Easy theme to do, and partly because The Muffin and I had both fallen in love with Sweetapolita's Rainbow Doodle Cake post, and really wanted to try it out.

So I baked the cake, following Sweetapolita's recipe. The only change I made was that whilst I did fill the cake with lemon Swiss meringue buttercream, I thought it would be too soft for the outer frosting layer. It was 39 degrees Celsius on the day of the party, and SMBC is just too soft for Australian summers - I learned that the hard way! So I coated the cake in white chocolate ganache (Planet Cake style), before covering it with white fondant.

Then I let The Muffin loose with my food markers. She had a lovely time!

(please excuse the extremely attractive great cavernous hole left by one of the fattest birthday candles ever...)


When the cake was cut, it really did cause a sensation!


One thing to keep in mind if you decide to make this cake: whilst it is easy, it does take a really long time to bake (unless you have heaps of tins the same size). I only have two 8-inch cake tins, so I had to bake the cake in three batches. Not difficult, just a bit time consuming, that's all.

Another idea I'd been dying to try out was one I found over at Bubble and Sweet. Her little smiley cloud cake pops are so adorable! My version turned out a little messier (I stuck the rainbows on in a hurry while the party was actually on - I know, I am just So Organised) - but I was still really happy with the result! The Muffin helped me make the little rainbows out of fondant, too.


The Muffin and I also made some small rainbow-shaped cookies and iced them with white icing. Then when they were dry, we drew rainbows on them with the food markers! We were very pleased with these, and I couldn't believe it the day after the party when I realised: We Had Completely Forgotten To Serve The Cookies!!

So I had an idea: as The Muffin started Pre-Primary on her actual birthday, she was taking cupcakes in to school to celebrate with the class. A little change of plan re cupcake paper colours and decorations, et voila:

Rainbow Cupcakes!

Our table decorations were very simple: we simply had one helium balloon in each colour of the rainbow, each tied to a clear cellophane lolly bag with just a few lollies and a very simple novelty (it was a gesture - we don't do full-on goody bags for family parties). These we lined up along the back of the food table so that the balloons floated in a line next to each other in rainbow colour order. It looked surprisingly effective!

We had great fun with this party theme, and the best thing was how excited The Muffin was at being able to help with it all (and I think she did a great job, too!)

Of course, the following weekend (ie yesterday), she also had a Princess themed party with all her little friends - but that's another story...

Friday, October 21, 2011

Royal Show Entries 2011

Wow, I can't believe I'm posting this so LATE. I'd been planning to post about these toward the end of Show week, while we were away on holidays. But I found myself trying to upload things using Husband's mobile phone's internet connection, which was So Slow that I gave up. And since we got home, I just seem to have been awfully busy!

Anyway, enough excuses - on to the sugary goodness...

I entered into three Classes at the Perth Royal Show this year: Decorated Biscuits (cookies), Patty Cakes (ie cupcakes), and Macarons.


The macarons were a nightmare. I made about twelve batches of the little buggers, wailing "Why did I write "macarons"? What On Earth Was I Thinking??" My macaron issues could easily fill a whole post, so I won't go into it here. Suffice to say, my macs tasted fine, and looked okay, but I was never in danger of winning any prizes! The ones I entered were the plain coloured one (at the front), and the back two pinks (the darker ones).

I was far happier with my cupcakes and my cookies. For the cookies, I decided to go with a Christmas theme:


All the decorating is royal icing, except the holly on the pudding, which I made from sugarpaste. I was really happy with how these turned out, and the judges must have agreed, because I Won! Woo hoo! The competition was a lot stiffer this year than it was last year, so I was really pleased.

Finally, for the cupcakes I decided on one of my favourite themes: Alice in Wonderland. After many preliminary sketches, and much elimination, I settled on these six designs:


You know how so often you have a clear idea of how you want something to look, and then when you make it, it doesn't turn out that way? Well this cupcake turned out Exactly as I'd imagined it - don't you Love It when that happens? I realise the Alice-Down-The-Rabbit-Hole cupcake design is not exactly an original one - it's been done by many, many people, including Planet Cake - but I've noticed that most of these designs use just a couple of flat white frills. I really wanted my Alice to have lots and lots of extra-poofy, voluminous petticoats.

Shhh - don't wake the Talking Flower - she might think you're a weed...


And don't tell the Queen that we've been Painting the Roses Red:


With all this cake, would you like a cup of tea? Or perhaps just half a cup...?


I also made a Bread-And-Butterfly with some little flowers, and a tabletop with a "Drink Me" bottle and tiny gold key.

Here's the whole set:

Most of the decorations are modelling paste, except the key, the red "paint", the "butter" and the little flowers' centres, which are all royal icing. The "Drink Me" topper (shown here sans cupcake) was sitting on top of a buttercream swirl for the Show to heighten the tabletop look.

Anyway, in case you're wondering - yep, these won their Class too! :o)

Saturday, October 1, 2011

Lolly Shop Cupcakes!


The Muffin and I decorated these for our cousin's 10th birthday party, and christened them "Lolly Shop Cupcakes"!

There are Freckle cupcakes (no frosting, just melted chocolate spread on thinly and covered with 100s & 1000s), twisty marshmallow cupcakes (with pink cherry flavoured buttercream frosting), Jelly Belly jelly bean cupcakes (with lemon buttercream frosting), Mini M&M cupcakes (with chocolate buttercream frosting), and Mini Licorice Allsort cupcakes (with chocolate buttercream frosting). The cupcakes themselves are light and fluffy lemon cake.

Yum!

Saturday, February 12, 2011

Spotty Party!

So I'm finally getting around to posting some pics of The Muffin's birthday party (a few weeks after the event, but hey, who's counting?)

For my little girl's birthday this year, she did not want Princesses. Or Fairies. Or Mermaids. No. It was "Mummy, I would like a Spotty theme for my party". I have no idea where that came from, but there we are. It actually suited me just fine, as
a) "spotty" is fairly easy as themes go; b) I like spots too; c) I think the princess thing will work better once she's of school age and the majority of the guests are under the age of fifteen; and d) she was willing to hand over complete creative control of her cake, provided it included spots and purple. Score!

So this is what I made:-

Overall I was pretty happy with it in the end. It was actually kind of a nightmare to make, as the weather was not only hot, but really humid as well. And we all know how much sugarpaste looooves humidity... In the end I had to take the whole thing to a friend's house to decorate it (thank you thank you - it's so nice to have awesome neighbours!), as refrigerated airconditioning was the only way I could think of to dry it out (like seriously, it was Wet). That's the other good thing about spots - they can be strategically placed to cover the worst blemishes!

I decided on the caterpillar and ladybug as a way of adding a cute factor, and also to add another personalised element... For Christmas I got Miniscule on DVD (after some fairly obvious hints in that direction), and it never really occurred to me that The Muffin would like it too. But of course it's so cute, and funny as well, that she has fallen in love right along with me. So I picked out two of the spottier characters for her cake - the ever-hungry and oh-so-cute caterpillar...


... and the ultra-cheeky, naughty ladybug...


The Muffin and I also made spotty cake pops:-


And spotty party-themed cookies:-
I did the Present and Party Hat cookies, and The Muffin did the Spot cookies.
(and no, these are not really my best work. I actually forgot to take a pic of the whole platter - these were the leftovers! So annoying, I do that All The Time...)

The kids played Musical Bobs, fished for spotty foam fish in The Muffin's paddling pool (each fish had a specific prize associated with it), and had a Popcorn Race. The race was actually really good. We split the kids into two teams (evening out the ages/ability levels as much as possible) and gave each team a big container of air-popped popcorn and a large spoon. The kids took turns scooping up a spoonful of popcorn and carrying it to the other side of the yard, where each team had another (equal-sized) container. The first team to fill this second container with popcorn won. Not a new idea, I know, but it worked really well with the popcorn, especially as it was fairly windy that day! :o)

Anyway, a good time was had by all, and The Muffin took one look at her cake and said "Miniscule bugs! Can I eat the caterpillar?!!" And you can't ask for more than that...

Sunday, February 7, 2010

My Little Pony Castle Cake

The Muffin has turned three!

And, as she is currently completely obsessed with ponies in general, and My Little Pony in particular, this year we had a Pony party, which of course meant a My Little Pony cake.

Other things were also made for this party - there were decorated cookies (ponies, of course), sparkly unicorn horns, Twinklewish Jellies (jelly jigglers set in heart shaped moulds, with pink edible glitter sprinkled on afterward), etc. I actually didn't get photos of everything, but my mum did, so I'll put some up when I get them (and if they turn out well).
But, as usual, the cake was the big deal, and that I do have photos of.

Now, I will just say that I've done something here that I don't normally do. Some time ago, I received the Wilton Romantic Castle kit as a gift, and have been itching for a chance to use it. A Pony party was the perfect excuse! The thing is, this kit involves applying icing to plastic, and I also decided early on in the design stage that my daughter would rather have plastic ponies she could keep and play with, rather than icing ones that would be eaten or thrown out. So for the first time ever on this blog, what you are seeing here is a cake that contains significant non-edible components. Even so, I am still pretty proud of this cake, and after all not everything is plastic. Apart from the towers, door, windows and ponies, everything is edible (my daughter was very pleased with the teapot, which she devoured complete with cups. And table).

One interesting thing about this cake: it is my first ever attempt at ganaching a cake (using the Planet Cake method). In the past I've always worked with buttercream, but I wanted as much stability as possible with the castle kit, so that the towers didn't just fall over. And when it's summer in Western Australia, buttercream doesn't stay terribly solid for long. The night I ganached the cakes it was 30 degrees Celsius at 9pm (yes, in our airconditioned house - we have evaporative), so even the ganache was fairly soft. Luckily the weather was a bit more reasonable the following day, so I was able to ice over the ganache with no problems.

Anyway, I've been wanting to try this method out for a while now (ever since my darling husband bought me the Planet Cake book - big kisses for him!). And wow. Don't get me wrong - I still love my buttercream, and I'll still be using it. But not under sugarpaste. Ever again. The ganache was actually easier to work with (which I was not expecting), and did indeed enable me to get slightly sharper corners than usual. I didn't make a huge effort with the edges on the bottom tier, as I wanted that to look a bit softer, as the green is obviously supposed to represent a grassy hill. But I was quite pleased with the edges on my round cake. I mean okay, they're not super-sharp, but it was my first attempt, and it was fairly warm.

So the cake itself? The bottom tier was lemon madeira cake, layered with lemon curd and white chocolate ganache, iced with the same ganache and then covered with green sugarpaste (or rolled fondant). The castle was dark chocolate mud cake, iced with the white chocolate ganache, and covered with white sugarpaste. The path is made of "Fizzers" lollies. The icing on the turrets and around the windows was royal icing coated with coloured sanding sugar, the leaves/plants were piped in royal icing, and all the other edibles (balloons, flowers, presents, ponies' hats, etc) were modelled in sugarpaste.

As for attaching the towers, I took the excellent advice of someone on a forum somewhere, and used a hot glue gun to attach a flower nail to the bottom of each tower. The kit suggests "gluing" plastic dowels onto them with chocolate, but I just felt that was not going to work here in February... Anyway, the flower nails worked a treat, and I actually found this whole kit very easy to use. Also fun. And it was worth the time it took to see the big eyes and delighted smile on my little girl's face.

Friday, August 21, 2009

RSPCA Cupcake Day

Last Monday was RSPCA Cupcake Day - an annual fundraiser in which everyone in Australia is encouraged to bake cupcakes and sell them to friends, colleagues, etc, with all proceeds going to help our furry and feathered friends. Naturally since there was cake involved, I had to be too.

Having done dog and cat faces last year, I fancied a farm animal theme this year, and in the end I decided on sheep and ducks. There was, in the end, some contention about whether my sheep looked like sheep or poodles, but I figured either way they were still animals.

I handmade my little duckies out of sugarpaste, and they sat happily on top of a swirl of blue buttercream, one for each cupcake.

For the sheep, I wanted the actual cupcake to be the sheep. So....

How to Build A Sheep (or possibly Poodle):


Make yummy cupcakes......... Pipe buttercream all over them using a star nozzle.....


Add marshmallows for the head and ears.... Pipe extra buttercream on top of the head....


And finally add eyes and nose with black icing - voila! A cute little sheep (or, indeed, poodle). (And his army of clone sheepoodles who do not as yet have faces...)

Anyway, I took my little menagerie to the Muffin's playgroup, and sold almost three dozen of them, raising over $90 for the RSPCA. :o)

Related Posts Plugin for WordPress, Blogger...