I can't believe it's only one-and-a-bit days until Christmas! The good news is, I actually think I'm all organised. For once. The tree is up, the presents are all wrapped, cards have been sent and received, and all the Christmas baking has been done. I'm even half way through preparing my contribution to the family party on Christmas night (dessert - did you guess?).
Who knows? We might even get that quiet, relaxing Christmas Eve I've been aiming for (and missing entirely) these last few years!
In the meantime, I thought I'd share this recipe with you. Nowadays it seems to me that every man and his dog make something that looks similar to these little "mini puddings". But as far as I can tell, most of those recipes involve either a) using leftover actual Christmas pudding/cake; or b) just decorating a plain chocolate truffle to look like a pudding. Both of which would be delicious, I'm sure, but they're just not the same thing as the ones I grew up with. This recipe gives a nod to Christmas pudding by its use of currants and brandy (and the decoration, obviously). But The Hero here is the chocolate/brandy combination. They are very chocolatey and yummy. And there's still time to give them a try!
Mini Pudding Truffles
190g currants
1/4 cup brandy
250g chocolate cake crumbs (this can be any old chocolate cake, it doesn't have to be fancy)
1/2 tsp orange zest
1/3 cup icing sugar
125g dark chocolate, melted
100g white chocolate Melts (maybe "bark" in America?? Whatever white chocolate product you'd use to coat something with, anyway)
2 tsp oil
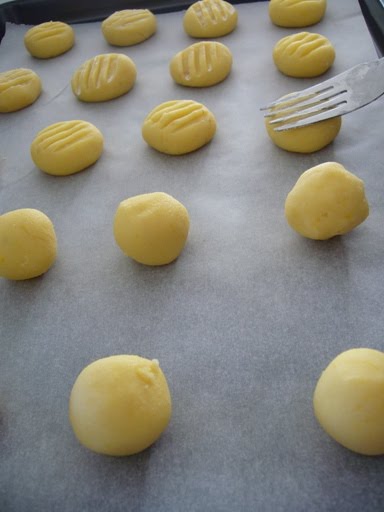
180g extra white Melts (these ones need to be round - see picture)
4 - 5 spearmint leaf lollies
2 - 3 red glace cherries
The first thing to do is soak the currants in the brandy for At Least one hour (overnight is even better if you have time).
When the soaking time is up, crumble your chocolate cake into fine crumbs, then add icing sugar, dark chocolate, and the currants WITH their soaking liquid.
 Mix together, and then roll the mixture into small balls and refrigerate for half an hour. Note: this is not the easiest mixture to roll, due to the currants, which spend most of their time pursuing freedom from chocolate captivity (one must ask oneself WHY?). I find it's more a case of squeezing them into balls, rather than rolling per se.
While the balls are chilling, get yourself a small sharp knife, and start cutting up your cherries and mint leaf lollies (you can also use green glace cherries or angelica, but personally I think the mint leaves taste better and are easier to cut). Cut them as you will, keeping in mind that they are supposed to end up looking vaguely like holly. Here is ours this year:

Very geometrical. Maybe a little bit too much so - maybe a more organic vibe would have been better, as per previous years. But triangles were easy. And hey, they're still cute.
Next, melt the 100g white chocolate Melts, and use a drop of this to "glue" one of your chocolate balls onto an intact white chocolate Melt (ie the "extra" 180g are for the bases). Repeat. Once your little "puddings" all have bases to sit on, they are ready for decorating.
Drizzle a little of the melted white chocolate Melts onto the top of each truffle, and add a piece of cherry and two pieces of mint leaf - voila! Holly! With this step you will need to work only two or three truffles at a time - because they are cold, you only have a limited window of opportunity until the white Melts solidify, at which point obviously your "holly" won't stick anymore.
 I realise this probably sounds all very complicated. It isn't. My three year old did a sterling job of sticking the "holly" on (see above).
And that's it - all you have to do now is a taste test! I encourage you to give these a whirl - they really do taste good, but honestly? For me the best thing about them is they're so darn cute. And when they're on a plate with lots of brown things (cookies, other chocolate things, etc), they really do inject some Christmas spirit!
And I should mention that I did not create this recipe! It was cut out of a magazine of some sort many years ago by my grandmother. So I'd love to credit its creator, but unfortunately I don't know who he/she was...
Merry Christmas everyone - I hope you and yours have a happy and safe holiday season!


 I know you're probably thinking that the spinach leaves were ambitious to start with, but she actually a) requested at the shop the other day that we purchase "leaves" specifically for MTM, and b) reminded me whilst I was making the lunch "don't forget the leaves, Mummy!" But in the end, she only ate two.