This is what The Muffin had for dinner on Sunday night - because after the day's festivities, a real dinner Just Wasn't Necessary.
Fresh pear (with a hen pick), chocolate chicken out of her Easter present stash, grapes, chicky-and-flower-shaped Vegemite sandwiches.
This was the perfect end to a fun day - The Muffin said "Mummy that was the Best Dinner Ever." Not sure what that says about my cooking, but hey.
Wednesday, April 27, 2011
Quick Easter Bento
Monday, April 25, 2011
Muffin Tin Monday - Easter Leftovers!
One of the things I love about Muffin Tin Monday is the opportunity to use up all those little bits of leftovers in the fridge. Today's Muffin Tin contains quite a few leftovers from yesterday's Easter Sunday lunch...
Top Row: Slices of orange; Mini hot cross bun; Pastry-covered cocktail sausage (shudder).
Middle: Easter Eggs from her present stash.
Bottom Row: Slices of chicken schnitzel; Baked beans; Bunny-shaped egg.
Even Husband and I had Muffin Tin Meals today. This is his:
Leftover salad, chicken schnitzel, orange, baked beans, mini hot cross bun, curried egg. Mine was essentially the same, but without the baked beans (I have never liked them, even as a kid).
And The Muffin ensured that noone missed out:
Happy Muffin Tin Monday, Frog!
The After Shot:
Husband and I were just about ready to jump out of the window by the end of this. The Muffin took An Hour and Ten Minutes to eat this lunch. I kid you not. And I actually have no idea why, because she did enjoy it, and she did seem to be eating most of the time. But wow, it just took FOREVER.
This isn't usually an issue for us unless we're trying to get her to eat something she doesn't like. So here's a question for you: what do you do when your kid is reeeeeeaaallly slooooow eating their meal?
To see what other mummies did this week, go to The Muffin Tin Mom's blog.
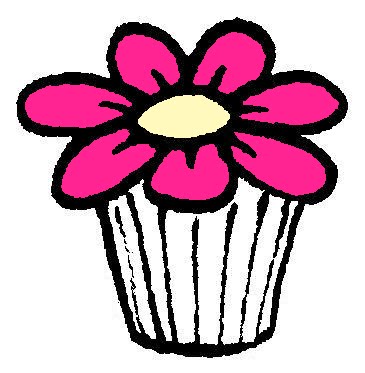
Bunny Ear Cupcakes
Okay, so "tomorrow" (meaning Saturday) didn't exactly happen, did it? Sorry about that. But here are the cupcakes anyway!
Firstly, I would like to point out that these are not in any way an original idea of mine. I copied this idea directly from Callye of Sweet Sugarbelle (who is a cookie genius, and whose blog you should check out immediately if you haven't already). Her version can be found here: http://sweetsugarbelle.blogspot.com/2011/03/bunny-ear-cupcake-toppers.html
The first step is to make the bunnies' ears. These are made by using a bunny-face cookie cutter, and then removing the head part from the ears before baking. Then half a popstick was "glued" to the back of each with stiff royal icing.
You know when you have what you think it an absolutely brilliant idea, and you go ahead and do it, and then afterward it occurs to you that anyone with a brain would have realised beforehand that There Was No Way This Was Going To Work? Well. For these cupcakes, I had the brilliant idea to bake a marshmallow in to each cake, thinking how lovely it would be to have a little pocket of pink marshmallow inside each one. I even tried two different construction methods, carefully documenting each one so I (and you) could decide which gave the best result:
Half the marshmallows were just poked in, and the other half were buried in cake mixture.

In the end (as you may very well have guessed) it made very little difference. The marshmallow in fact soaked completely into the cake, causing quite a pleasant overall flavour, but no cute pink pocket of marshmallow. Yeah.... I probably should have guessed that would happen... I imagine the result I was actually going for could be acheived by baking the cupcakes as normal, then removing a small scoop of cake from the top and poking a marshmallow in whilst the cake is still warm. I'll try that next time and tell you how it goes...
Anyway, they were still yummy.
And they were still awfully cute.
And they were still awfully cute.

Oh, and the cupcake wrapper template I got from here: http://www.snowandgraham.com/blog/?p=339 It's an easy to use, just-print-and-cut-out template, with no photoshop or Other Messing About With Computers.
And then the finishing touch is a cutey-patootie little strategically placed cotton ball:

Bunny bottoms! Squee!
Happy Easter everyone!
Friday, April 22, 2011
Easter Cookies
So here are (most of) the rest of my Easter cookies this year. I decided to go for a pastel pinky-type colour scheme this year. For my bunnies, I wanted to try doing two different designs from the one cutter - this is what I came up with:
 I would have liked the detail on these to be a bit more delicate, but unfortunately my smallest piping tip is a number 2, and this is a smallish cutter - not a mini, but not a great big one either. Maybe I'll get some smaller tips for my birthday this year...
And here are The Muffin's favourites - my chicky cookies:

The design for these was inspired by a picture I saw in a craft magazine lately (I think it was papercraft - maybe a greeting card or something?) I thought it was adorable, and that it would make a cute cookie.
And a group shot:
 Tomorrow: cupcakes!

The design for these was inspired by a picture I saw in a craft magazine lately (I think it was papercraft - maybe a greeting card or something?) I thought it was adorable, and that it would make a cute cookie.
The cookies themselves? The bunnies are all lime and coconut sugar cookies (a combination that I just love). To make these delicious cookies, just add the zest of 2 limes, and 1/4 cup finely chopped shredded coconut to your usual sugar cookie recipe. As a result, you will find your dough is probably a little drier than usual when you mix it. Add the juice of half a lime, and mix briefly again. If it still a bit dry, add the juice of the other half. Chill it before rolling out.
The chickies-in-eggs are white chocolate sugar cookies - these are nice, but the lime ones are better.
And a group shot:
 Tomorrow: cupcakes!
Thursday, April 21, 2011
Easter Bunny Cookies
I can't believe it's almost Good Friday, and I still haven't posted any Easter cookies here yet! Particularly since my cupboard is full of them...
So these basic bunny faces were the first cabs off the rank this year...
They have M&Ms for noses (pink ones from a Breast Cancer Awareness pack I've been hoarding). The pink parts of the ears were done using the wet-on-wet technique (which I am new to, so be nice), and the mouths, pupils, eyelashes and freckles were drawn on with Gourmet Writers.
Then they just needed a little bit of packaging, and they were off to Kindy as little Easter presents for The Muffin's teachers... More tomorrow - hippity hop!
Tuesday, April 19, 2011
Muffin Tin Monday - Chickens C.O.O.E.
I had issues posting this week, due to an unforeseen computer update (grrr...) but it's all sorted now, so let's just pretend it's still Monday, and press on:-
The Muffin was very specific about what the theme of today's Eastery Muffin Tin was to be: "Chickens Cracking Out Of Eggs".
So here we go:

Top Row: Corn (for the chickens to eat); Grape "eggs" with a hen pick "sitting" on them; Easter Egg cookie made & decorated by The Muffin. The cookie was baked in half like this - I was informed that "the chicken has cracked out of its egg already". So we thought it would be a good addition to this tin.
Bottom Row: Cheese chicks; Nest; Apple chicks.
The nest was constructed from a rice cake, spread with pureed pineapple and topped with toasted coconut. In retrospect, the pureed pineapple was not the best choice, as it made the rice cake soggy. The Muffin said it still tasted nice, but she asked for a spoon to eat it with. :o) And she had fun putting the little cheese and apple chickies in it...

As you can see, the apple chicks (the one at the back of the nest) have a bit of a washed-out look to them. The Gourmet Writer didn't work too well on the apple, but it was great on the cheese:
So here we go:
Top Row: Corn (for the chickens to eat); Grape "eggs" with a hen pick "sitting" on them; Easter Egg cookie made & decorated by The Muffin. The cookie was baked in half like this - I was informed that "the chicken has cracked out of its egg already". So we thought it would be a good addition to this tin.
Bottom Row: Cheese chicks; Nest; Apple chicks.
The nest was constructed from a rice cake, spread with pureed pineapple and topped with toasted coconut. In retrospect, the pureed pineapple was not the best choice, as it made the rice cake soggy. The Muffin said it still tasted nice, but she asked for a spoon to eat it with. :o) And she had fun putting the little cheese and apple chickies in it...
As you can see, the apple chicks (the one at the back of the nest) have a bit of a washed-out look to them. The Gourmet Writer didn't work too well on the apple, but it was great on the cheese:

The After Shot:
Clearly corn is much more acceptable when it is real corn on the cob, as opposed to frozen corn out of a bag. Can't say I blame her.
There was a good deal of narrative that accompanied the eating of this snack. The Muffin described at length what was happening at all times ("this chicken is now going out to buy an Easter present for that one. That one is staying home with its daddy" *chomp*)
To see what other mummies did this week, go to The Muffin Tin Mom's blog.
Wednesday, April 13, 2011
Heart Bento
This was The Muffin's kindy lunch yesterday:-

Heart shaped ham sandwiches; Grapes in a heart-shaped silicon cupcake liner; Babybel cheese with a heart cut out; Apple.
I cut the green apple in half, cored it, then used the same small icing cutter that I used on the Babybel to make a couple of little heart shapes. I then used a paring knife to remove the skin from the little hearts and rubbed the exposed surface with a little lemon juice to stop it going feral. Next I did the same thing to a red apple, removed the little red apple skin hearts, and inserted them into the holes in the green apple.
My original plan was to make the two apple halves the same, each with one central red heart. Luckily I did one and looked at it before cutting into the other. At this point it became clear to me that my daughter could not possibly go to kindy with green boobs in her lunchbox. Hmm. What is it with the naughty food this week?? Anyway, slight design change = sorted. :o)
Everything was eaten. I am linking this to What's For Lunch Wednesday - go and check out the (in a lot of cases much more creative) other entries!
Monday, April 11, 2011
Muffin Tin Monday - Easter Bunnies!
It's Muffin Tin Monday! And we are finally hopping on to the Easter theme bandwagon (I decided three Easter-themed tins was enough).
And before you even think it, no these bunnies are NOT doing Anything Untoward. I repositioned them Several Times, and I kid you not, this was the least offensive...um... position I could find with both of them showing their faces. They are Just Friends. Really. 
Top Row: "Carrots" made of red apple (The Muffin's idea. Apparently carrots made of carrot are soooooo last season); Pikelet bunnies spread with lime marmalade and accented with M&M Baking Bit noses and Rainbow Chip eyes; Banana with a bunny pick.
Bottom Row: Carrot bunnies; Hommus; Rice cake bunny (features drawn with Gourmet Writers).
Closeup of rice cake bunny:

I was so pleased with this - I just used one of those Thin rice cakes and cut it with a cookie cutter. I wasn't sure whether it would work, or if the rice cake would just disintegrate. As it happened, it was very easy and effective. Yay!
The After Shot:

The Muffin was pleased with this tin. She tried the hommus (which is new for her) on the rice cake first, and didn't like it (she does like rice cakes). I convinced her to try it on a carrot, and she liked it on that - even asked for the leftover hommus to be included in her lunchbox tomorrow for kindy! She liked everything else, but especially the pikelet bunnies.
To see what other mummies did this week, head on over to the home of Muffin Tin Monday - The Muffin Tin Mom's blog.
Wednesday, April 6, 2011
Snickersy Cookies
But not using actual Snickers bars. Oh no, because that would be too easy...

So a few evenings ago, Husband was sniffing about for cookies. I said "we have Tim Tams." He considered this briefly, and said "Do we have anything homemade?" Meaning he would rather have my baking than Tim Tams. Really.
Do you see why I love him?
Anyway, I said no, but indicated that I might bake some in the next day or two, and did he have any preferences. He said vaguely "I like Snickersy cookies." I indicated that I had no idea what he was talking about. But I really liked the idea.
Now I'm fully aware that I am a Very Long Way from being the first person to try this idea. But I made the conscious decision this time not to look at the internet*. No. I would make up my own Snickers cookie recipe. So here it is.
*(except the caramel)
Snickersy Cookies
Ingredients
250g Plain flour
130g Self Raising flour
1/4 tsp baking soda
3/4 cup melted butter
1 cup brown sugar
2 tsp vanilla extract
2 Tbsp peanut butter
1 egg
1 egg yolk
1 quantity of this caramel recipe. The people at http://www.candybarlab.com/ describe this as "the type of caramel you'd find in Twix or Snickers", and they clearly know what they're talking about - it's Exactly What You Want for anything involving soft gooey caramel. Yum. After you've made it, refrigerate it - you want it cold for this recipe.
Enough salted roasted peanuts for about three or four whole nuts to each cookie.
200g dark chocolate (or milk chocolate I guess, if you're that way inclined. I always prefer dark.)
Modus Operandi
Cream butter and sugar. Add peanut butter, vanilla and eggs, and beat until creamy. Sift the dry ingredients in and mix until it comes together as a dough.
Roll into balls (about 1/8 of a cup of mixture each), and place onto a lined cookie tray. Next, make a very heavy impression into each cookie. This needs to be quite vicious - they will almost look like donuts, stopping just short of having an actual hole. Like this:

The cookies will flatten out a lot in the oven, so after baking, each cookie will be left with a large-diameter but very subtle dent in the top (which of course I forgot to take a photo of. Sorry).
Bake cookies at 165 degrees Celsius, for around 20 minutes.
Once cookies are completely cool, get your caramel out of the fridge. Dig a piece out with a spoon (probably just under a tablespoon - I didn't measure - but basically whatever amount is going to fit comfortably into the slight impression on the top of your cookie). Squish it into the impression on the top of one of the cookies, and press 3 or 4 whole peanuts (or 6-8 halves) into the caramel. Repeat with remaining cookies.
Finally, melt your chocolate, spoon it into a disposable piping bag or ziploc bag, snip the corner off and drizzle the chocolate over each cookie. Alternatively, you can just dip each cookie's top into the chocolate, covering the caramel and nuts completely. This gives a higher chocolate-to-cookie ratio. Both ways are good, but I prefer the look of the drizzled ones.
If it is warm where you live, you will probably need to set these (and store them) in the fridge. Although Husband would like me to point out that he believes they taste better at room temperature. He's probably right. At room temperature they do this:

Seriously, how cool is this caramel???

And to be honest, if they last longer than a couple of days at your place, then you have More Willpower Than Us...

Note: The cookie part itself is not very sweet on its own. This was deliberate on my part, as I was about to add a big lump of caramel onto the top. So if you taste one before you top it, don't be alarmed. If you like caramel, or chocolate, or peanuts, or (especially) grisly combinations of all three, then I'm sure you will like these.
I only wish there were some left...
Monday, April 4, 2011
Muffin Tin Monday - Butterflies & Flowers
It's Muffin Tin Monday! This week we decided on a Butterflies & Flowers theme, in honour of my new Wiltshire muffin tin I got on sale at Kitchen Warehouse (only $4)...  Top Row: Banana cut into chunks with a home-made flower pick (sticker on a toothpick); frozen mixed berries with a royal icing butterfly left over from some recent cupcaking.
Middle Row: Yoghurt with a bit of vanilla and three gumpaste flowers; Butterfly Cookie (cunningly crafted from a W cookie and an I cookie - see my last post if this makes no sense at all).
Bottom Row: Salami on another homemade flower pick; Butterfly pikelet (made by chopping up round ones into a vaguely butterfly shape - a bit of a half-hearted attempt on my part, but she was happy with it). Also another royal icing butterfly (which she informed me was the pikelet one's baby).
 She scoffed the lot, although surprisingly did not eat the icing butterflies. She bit a piece off of each of the pink one's wings, announced that it was "now a different sort of butterfly", and that was it. Hey, I'm not complaining. Any time my daughter refuses sugar is a cause for celebration, as far as I'm concerned (or possibly a sign that she is tremendously ill).
Next week I think I'll put a bit more forward planning in and start pushing The Muffin out of her comfort zone again. I've been a bit slack lately, just putting in things I know she likes, but one of the things I love about MTM is that she's a lot more likely to try new things this way..
To check out what other mummies did this week, go to the Muffin Tin Mom's blog.
Saturday, April 2, 2011
Baking With The Muffin: C is For Cookies!
For her birthday this year, The Muffin got quite a few cooking-related presents. One of them was a fantastic cookbook called The ABC of Kids Cooking. I really like this book, as it contains enough sweeties to keep the kids interested, but enough savoury things (including dinners and lunches as well as snack-type things) to keep me feeling as though I haven't bought her a book entitled The Kids' Guide To Sugar. It also has the novelty factor of being arranged alphabetically - ie. A is for Apple Turnover, B is for Banana Smoothie, etc. Several of the letters have different versions (eg there are five different recipes under K is for Kebab). We have decided to do the whole book in order (thus ensuring I don't get to say "no" to any of the sweeties, and she doesn't get to say "no" to any of the healthy ones). And, of course, C is for Cookie.
 The actual cookies were quite yummy. They have a fair whack of honey in them - enough to make them definitely honey flavoured. The icing was what I would call sort of royal icing - egg white, icing sugar, and a bit of lemon juice, but not beaten to peaks like "real" royal icing. I Resisted The Urge to get out my piping bags. The point of this exercise was, after all, a fun baking activity with my four year old, not decorating cookies for somebody's wedding or birthday. So I used a spatula like a good mummy, and called open season on all my sprinkles.
Naturally, they would have looked better if I'd piped them.
These are the ones my daughter did:
 Not a bad effort for a four year old Muffin, I thought. And the main thing was, we had a ball - and she was so proud of her creations!
So next time you're wondering if you should bake with your kids, or if it's too much trouble - live a little. Do it. Yes, there will be sprinkles on the floor afterward, but that is what your vacuum cleaner is for. And this is what childhood memories are made of.
Anyway, if nothing else, it's a hell of a lot more fun than Today's Thirty-Third Game of My Little Ponies Have A Birthday Party. It really is. Trust me on this one.
Subscribe to:
Posts (Atom)